 Once all the roof glazing bars are out the ridge bar is the next. This is a simple job, two bolts only hold each end of the bar, these are untightened and then usually slide down the end extrusions allowing the bar to come away from the end sections. This is one operation where help is a bonus.
Once the roof is off you will be left with four walls bolted together. Every greenhouse is fitted to its base in its own way, this is the time to remove the greenhouse from the base. Once free from the base each corner of the house is generally held with three bolts, two at the top and one at the base. 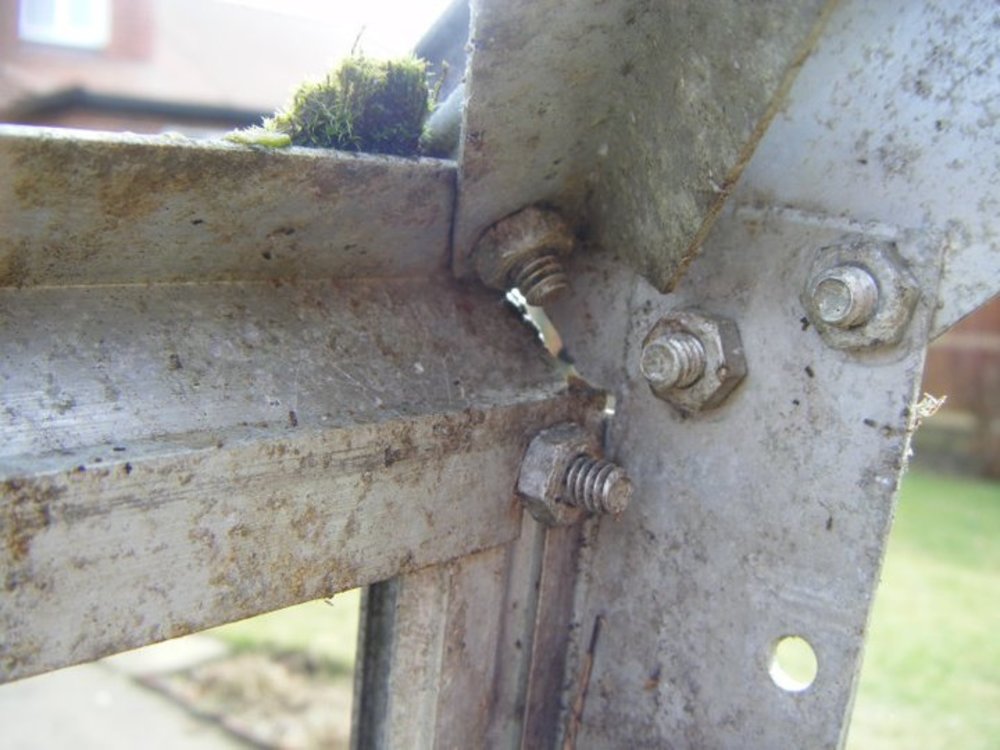
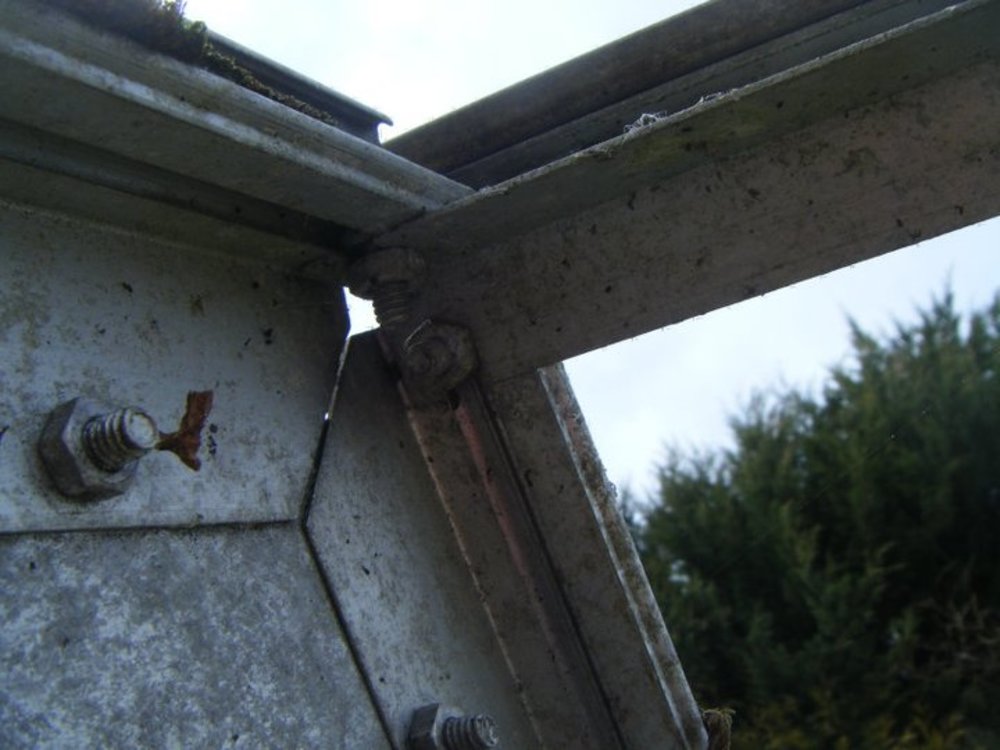
The photo to the right shows a top corner section where on this particular greenhouse the bottom nut will untighten and the bolt can slide down away from the junction. The bar that the nut tightens over is the top bar of the side section. The top nut will require complete removal to allow the roof corner support bar to be removed before the bolt can be slid upwards and free of the junction. Once both bolts are away from the junction the side bar will simply slide out and the top of this section of the greenhouse will be free.
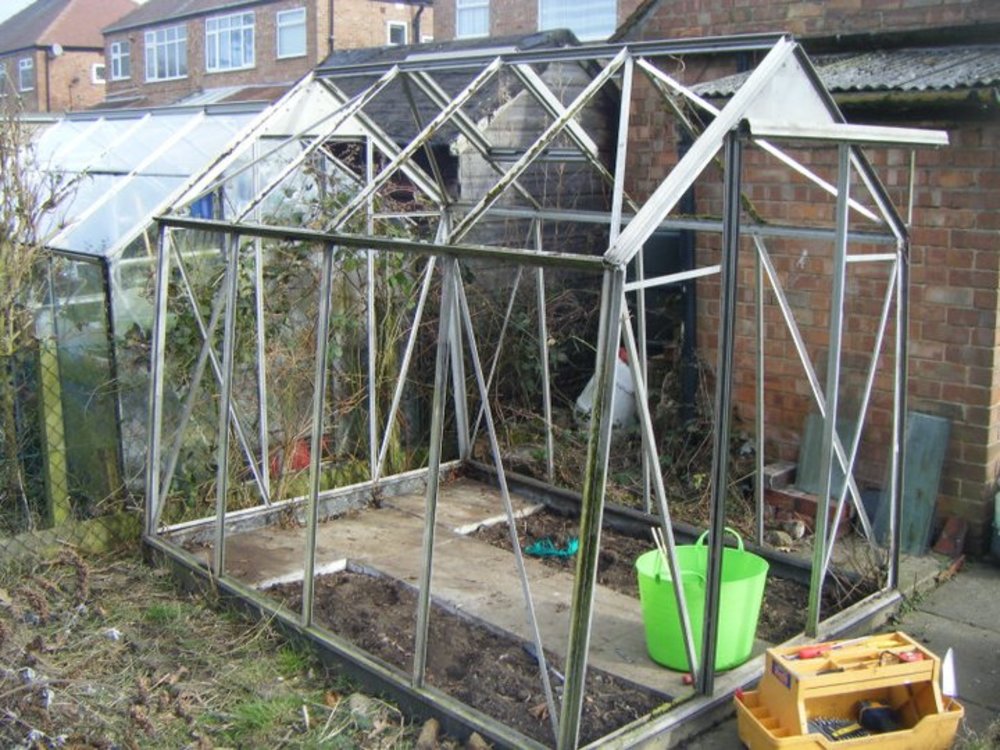
The bottom junction is dismantled exactly the same but there is only one bolt holding the bottom of the end section to the bottom of the side. At this point help is more than a bonus, you will now have a very unstable greenhouse flapping around. Carry on around the other three corners and you wll be left with four greenhouse sections looking a little like this.
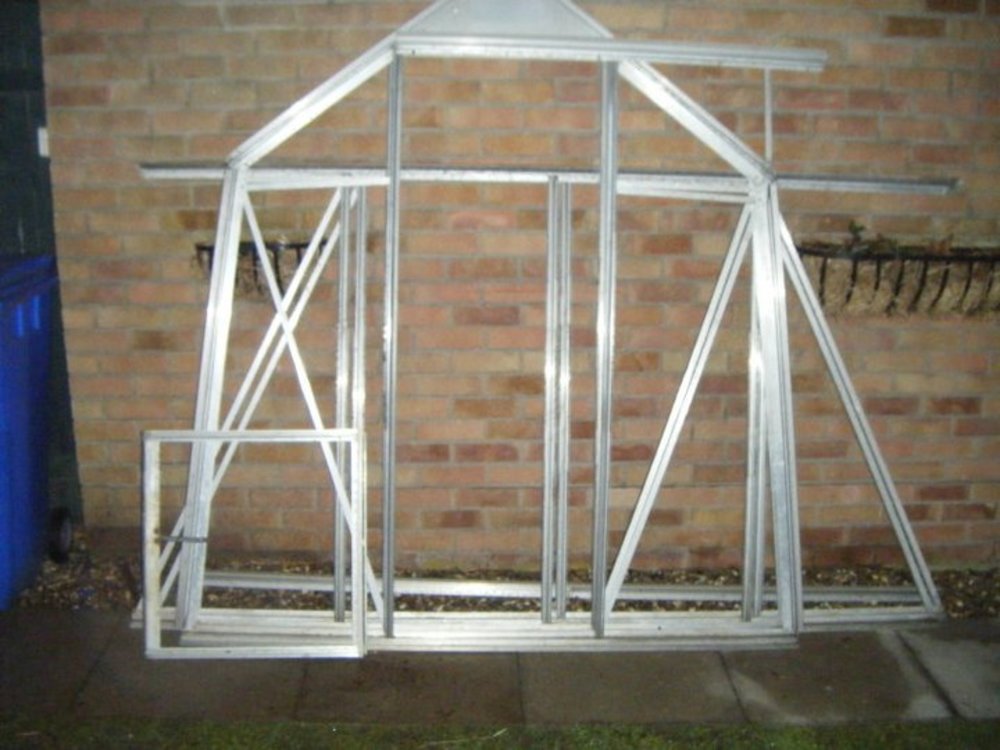 This is as far as I go when I'm dismantling. I transport the greenhouse in four sections which makes reassembly a breeze. If you need to completely dismantle then I strongly recommend you make detailed notes of where each part goes, especially the ends. Keeping each section's parts separate will also help.
Rebuilding the greenhouse is basically the reverse of the dismantling procedure. The main point to remember though is that the glass is square, and will only fit into a square frame. Two things are critical when you rebuild, all four corners need to be 90 degrees, most people understand that. Where many fall down though is by not having a flat level base.
Your gutters will follow the base exactly, if you stand back and look side on at your gutters they need to be perfectly parallel. If they are not your greenhouse is twisted and I can guarantee that somewhere your glass will not fit properly. The only way this can be corrected is to lift the corner that is low, ideally by making the base true. If this is not possible you can pack the low corner and make good with concrete. Spend time and care on your base though and everything else will follow.
If you have found this useful please let me know, I love to hear from you and if you have found anything less easy to follow then I will try and rewrite it. I deal with greenhouses every day and I appreciate I may be assuming people know more than is the case. Finally if you need any nuts and bolts, glazing clips or glazing seal to rebuild your greenhouse I would really appreciate your business. If you're anywhere near East Yorkshire we are also cheaper than anyone else for glass, sadly we cannot post this though.
Good luck with your rebuild and happy growing, Ian isitt.
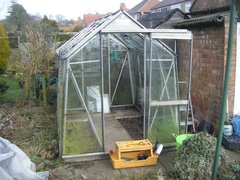
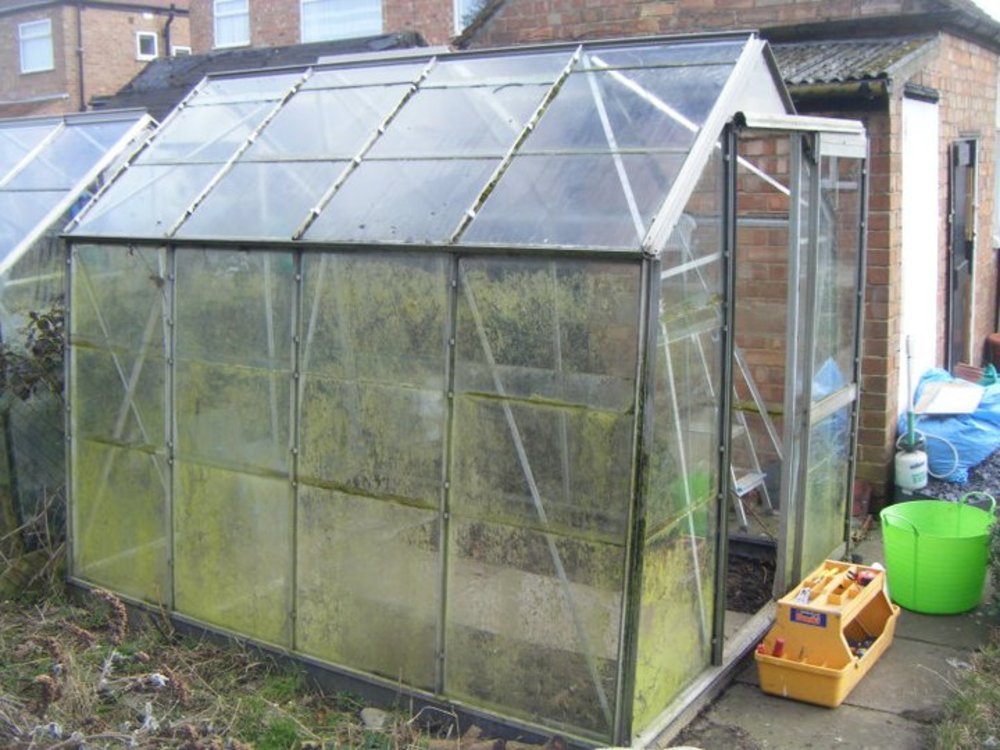 This is a typical greenhouse that has been unused for a while. This one was made by Crittal who were quite popular a while back but like many manufacturers stopped building greenhouses many years ago.This one luckily had a fully working door and all the glass was more or less complete, many do not.
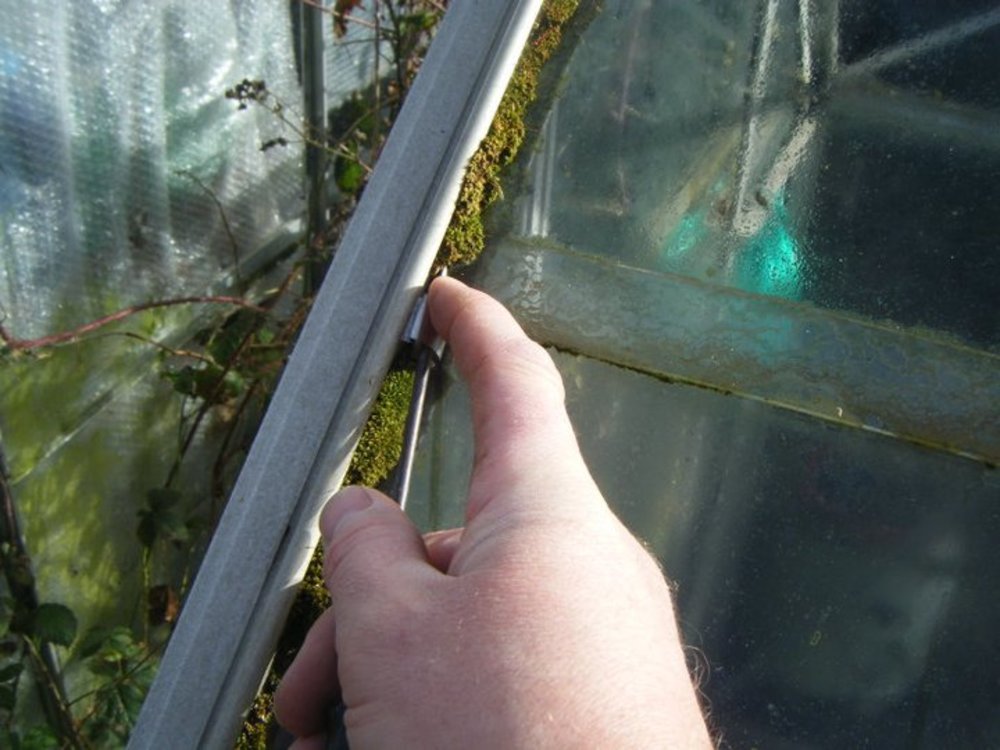
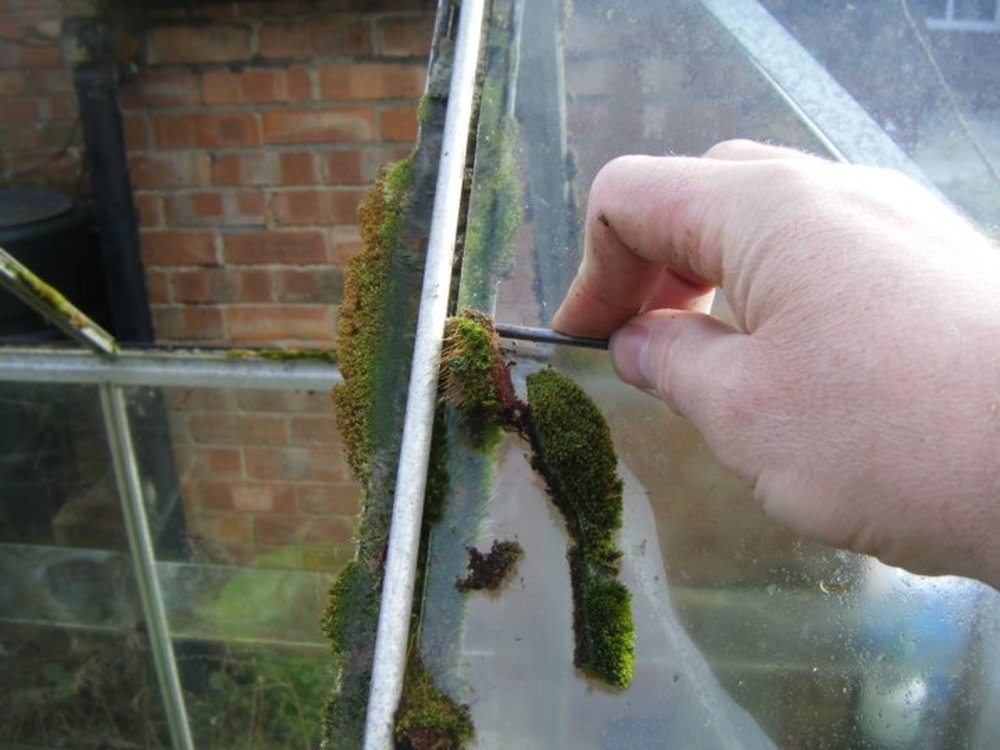 This is a good view of the moss that soon grows in the moist areas of the roof glazing bars. It also means that if galvanized wire "W" glazing clips have been used they will almost certainally be rusted in a roof such as this.
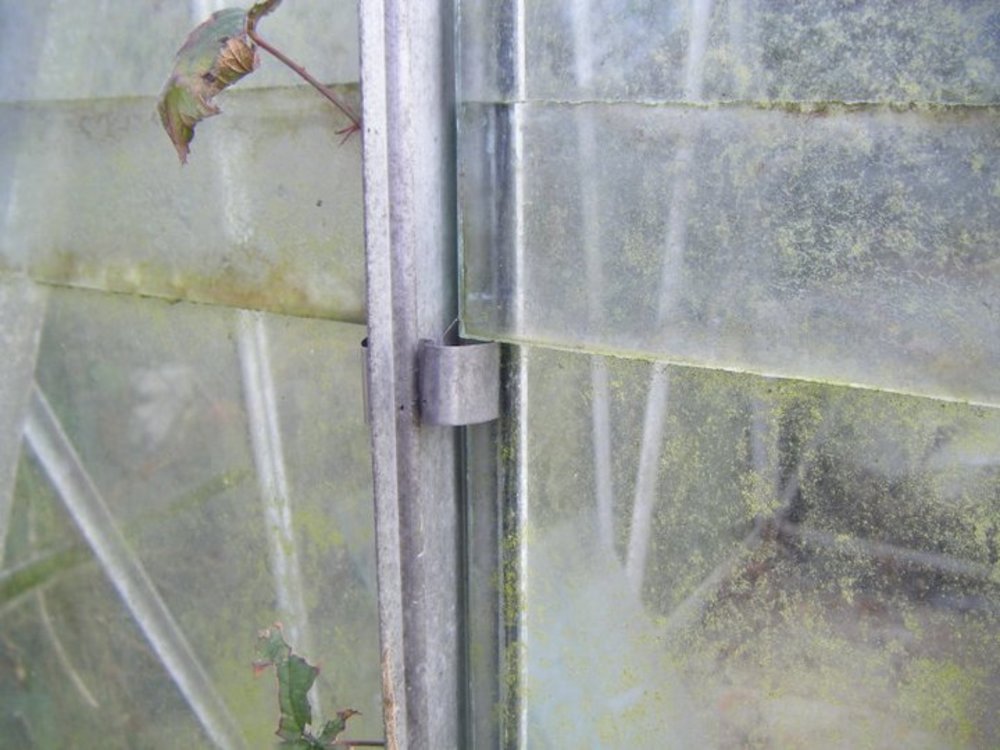 Once the roof is clear start on the sides. I have shown this clip to illustrate a common problem which I consider to be dangerous. These "G" clips are designed to hold the glass in place against the frane only. They have been used here to space the glass as well as the sheets were not the correct size.
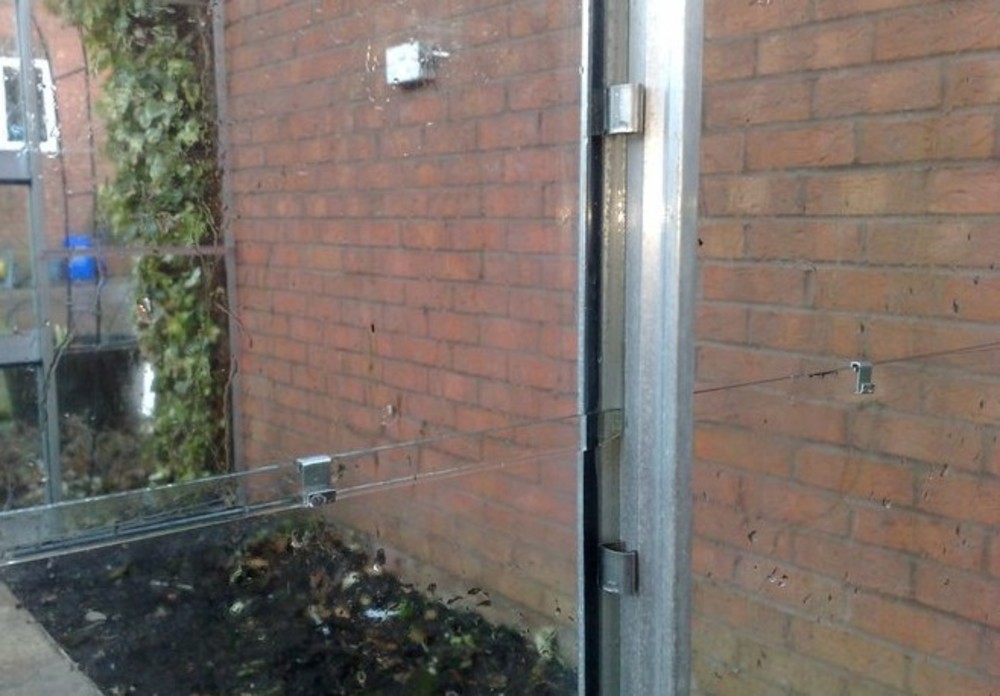 If you look at the picture on the right this shows the correct way glass should be held in place. If you are unlucky and find the greenhouse does not have any overlap clips do not try and cut corners, make sure you put them at the top of your shopping list. There is an alternative clip available which we use when building new Elite Greenhouses, these are an aluminium part formed clip. The top is formed and sits over the lower sheet of glas, once the top sheet is in the correct position the leg of the clip is bent around the glass and holds it securely in place. This also allows for a little adjustment if the frame is not perfectly square.
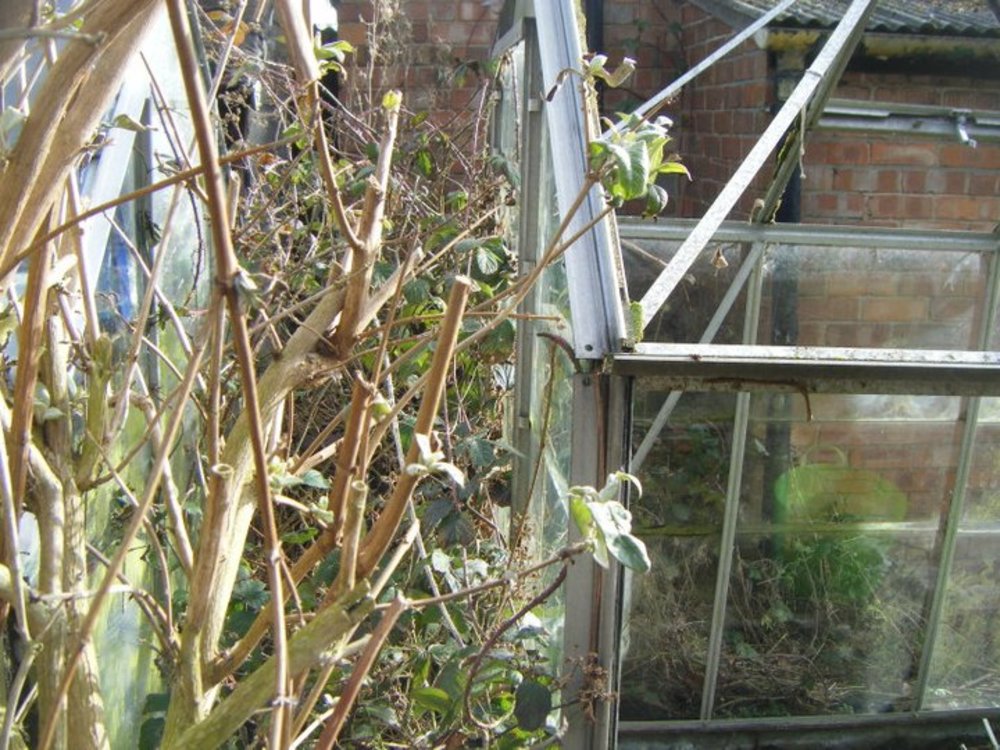 Here's a common problem you may encounter. Brambles had been allowed to grow against the back wall making the glass difficult to remove. Glass always has to come out from the outside so hedges and brambles are not a welcome sight.
 The unglazed greenhouse starting to be disassembled. The first job was to get the door off. There is usually a bolt or bracket stopping the door from sliding completely off the track. Remove the bracket and slide the door off the track.
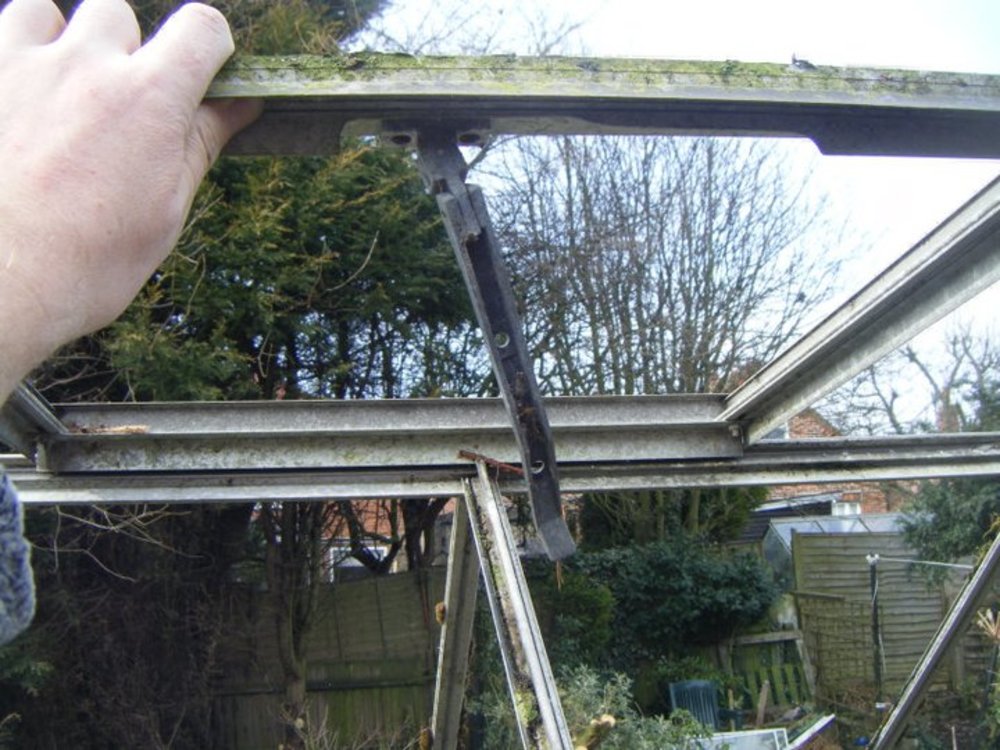 The roof vents need to come off next. You will find that the roof vent slides into the ridge bar from one end and the vent and ridge bar form the hinge themselves. Some form of stop is often employed to keep the vent from moving side to side. Elite use a rubber tube with a screw to lock this in place, others use a bar with a screw inside.
 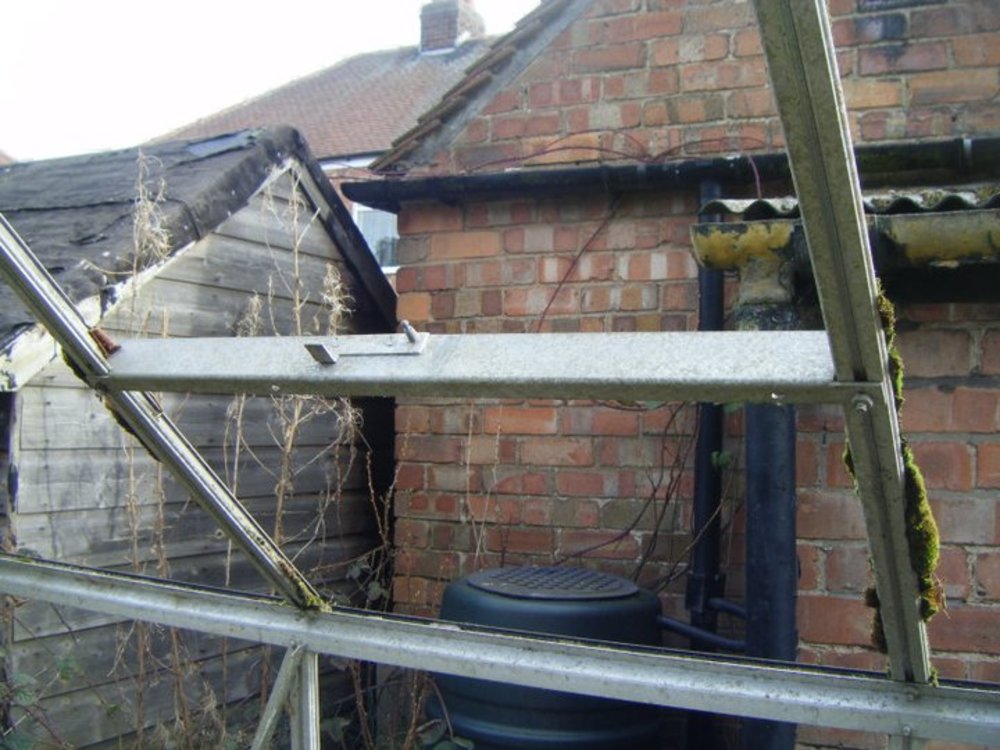 The slam bars for the vents come off next. Two bolts are used to hold these in place, once they are loosened slide one side down until it comes away from the roof glazing bars. Some models may need the nut removing completely but most have a slot which allows for loosening only.
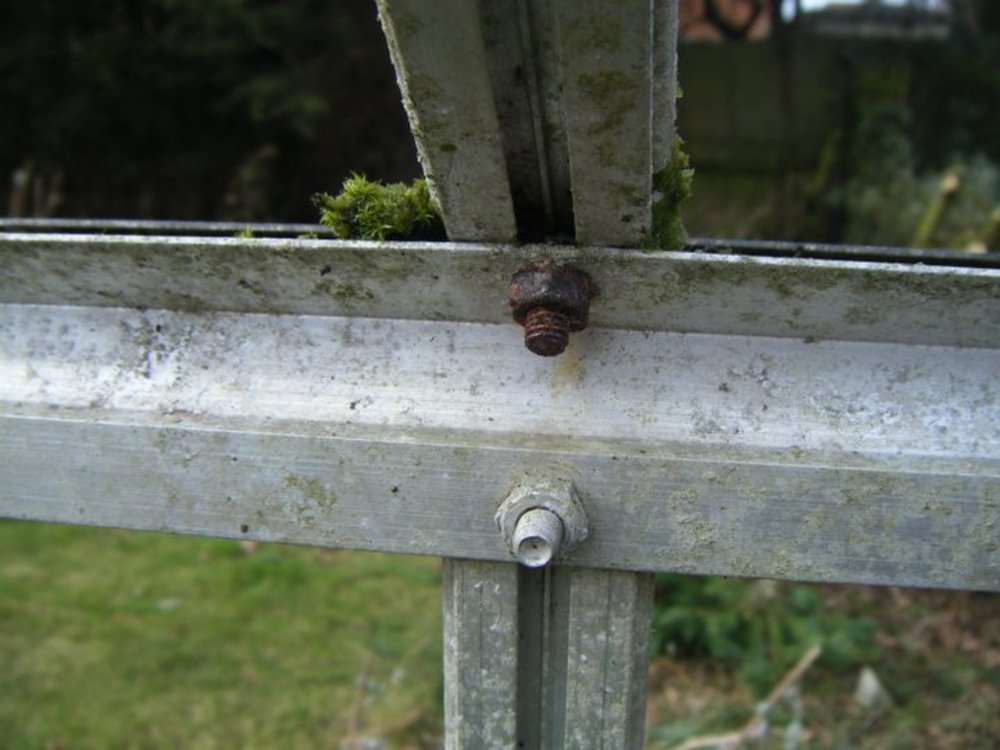 The roof bars are the next item to be removed. You may be very unlucky and find thet steel bolts have been used in places, as have been used here. These are a nightmare and I have never sucessfully undone a steel bolt in a greenhouse. (Google "Galvanic Corrosion") Even with copious WD40 applications the rust that will inevitably be there will tend to hold the nut on so tightly that the bolt head will spin in the glazing bar channel.
  This will damage the bar and generally mean a bodge at best to refit, at worst a new bar to add to your budget, (glazing bars are fairy interchangeable within reason). I carry a small pair of bolt croppers to cut the nut off, you will be unlucky if you come across this though, most people have enough sense to use the proper aluminium bolts.